Landscape Painting Tutorial - How To Paint A River Through The Trees
Introduction
Hi everyone! Here is another painting tutorial where I will prove you how to paint this landscape scene with the river running through the trees.
The painting is based on a photograph from New Zealand (I can't help myself but do some other New Zealand painting - I just accept too many beautiful photos).
I enjoyed painting this scene. To me it has a pleasing composition and color harmony. There is also an interesting notan design in the scene (the balance betwixt lights and darks).

Materials Used
Pace 1 - Stain & Sketch
I start this painting like I start many others. I lay downwards a light stain using raw umber thinned to a very watery consistancy.
I then sketch out the general composition. In that location is not much detail hither but just enough to give me an idea of how to navigate the painting.

Step ii - Block In The Sky
I start by painting in the heaven. I use a very large castor as I do not want to get bogged downwards in any detail just nevertheless. I besides pigment slightly darker than what is in the reference, with the intention of going back and lightening things upwards later on (it is much easier to lighten a color than it is to darken it).


Stage 3 - Block In The Residue Of The Painting
I then move to cake in the residue of the painting.
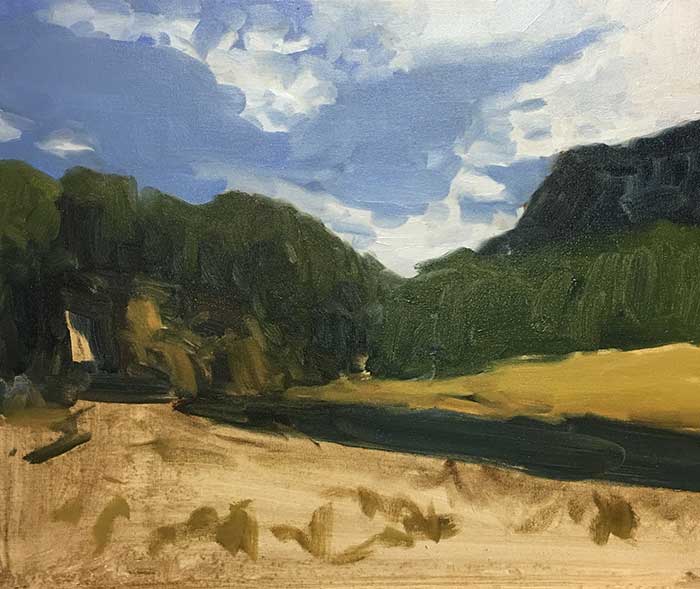
The chief thing I am focusing on here is to go the right color harmony of the scene. Overall the painting is far too nighttime, but this is intentional. This is but the base which I will go dorsum over and refine in later stages.

Phase 4 - Simplification In Action
This is an important phase.
I realised in the previous stage I started to add together too much particular. I was getting caught up in the smaller aspects of the painting rather than sticking to the more important elements.
And then what practice I do?
I grab a cloth and wipe downward the overworked area with no hesitation. Look how much cleaner information technology looks later on I wiped it down.
I take no event with taking these kind of desperate steps during a painting. I would much rather take a take a chance and go for that slight take chances of a great painting than settle for an average painting out of fear.

Phase 5 - Burnish The Sky Add together Texture Using A Palette Knife
At present I start to lighten up the painting. I start with the heaven and pull out my palette pocketknife.
The palette pocketknife allows me with thickly employ paint in an impasto mode. I desire the heaven to really pop.

Stage 6 - Start Highlighting The Foreground
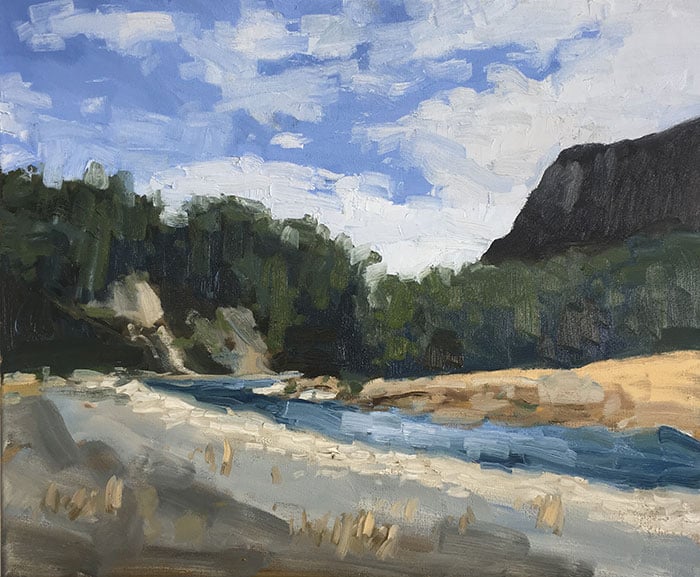
I must at present residue out the balance of the painting past adding highlights to the foreground. I outset with the yellow area on our right.
I use a very large brush for this and do not completely mix my colors so that there are subtle streaks of various colors in my strokes. This creates an interesting effect in the painting.

Stage vii - Fix Edges, Create Harmony And Finish The Painting
I proceed to work my way around the painting and try to balance all the elements every bit all-time I can. At no phase do I use whatever very small brushes.
When I needed to add more particular details, I simply use the side border of my medium filbert brush.
Y'all will find I employ shorter and more vibrant strokes leading upward to the turn in the river, where I want to concenter the viewer.
Cheers for Reading!
Cheers for taking the time to read this post. I capeesh it! Experience free to share with friends. If you desire more than painting tips, bank check out my Painting Academy course.
Happy painting!

Dan Scott
Draw Pigment Academy
vondoussadrinnera.blogspot.com
Source: https://drawpaintacademy.com/how-to-paint-a-river/
0 Response to "Landscape Painting Tutorial - How To Paint A River Through The Trees"
Post a Comment